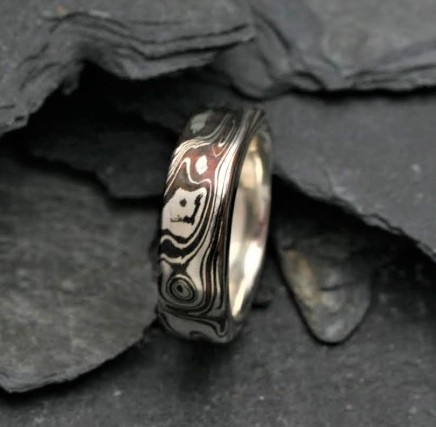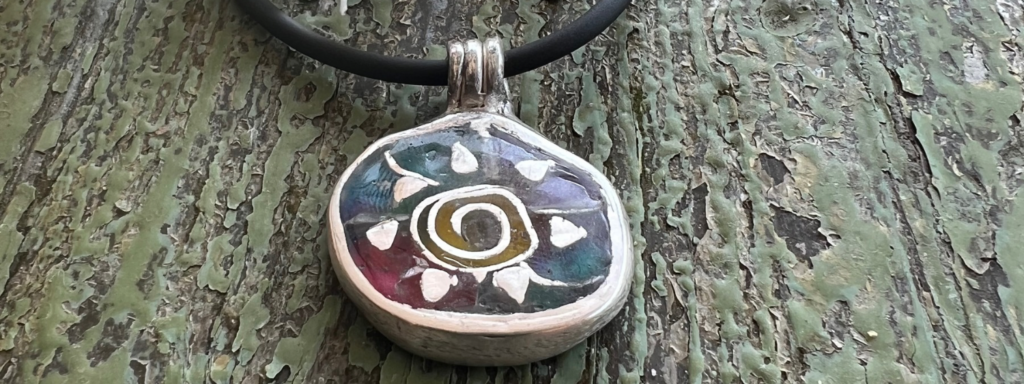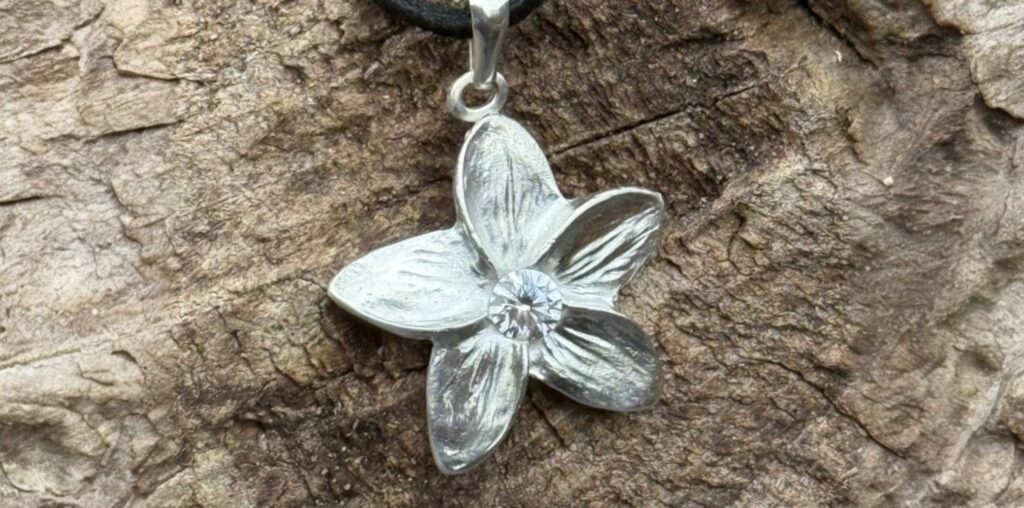
Basic description Silver jewelry made of silver clay.
Basic instructions for making earrings, ear studs, pendant or charm.
The design
Draw out your design and keep the following in mind:
-
Decide what you want to make, determine the shape and whether it should have a structure.
-
Decide whether the jewelry piece should be flat, have a convex shape or have a wave.
-
For a pendant/charm, determine what the pendant eye should look like. (Eye visible or not visible, ready-made screw eye, pendant eye or an eye made of clay. )
-
For an earring, determine how it will be attached to the hook (Eye visible or not visible, ready-made screw eye, pendant eye or an eye made of clay. For ear studs, after the earrings are baked off, plugs are soldered behind them).
-
Want a texture in your design? Find the texture you want (wallpaper or rubber mat) in advance and choose a sampler or template for the shape
The implementation
Basic tools for modeling your jewelry:
1. Slats of varying thickness. With these you can roll out the clay into even patches of clay
2. Work mat
3. Anti-sticking agent ( Coolslip or olive oil).
4. Clay roller
6. Needle tool
8. Tray of water or water brush
9. Tweezers
10. Baby wipes
11. Pressure plate or Snakeroller
Tools for your design: What do you need extra to create your design.
For example:
-
Tools and / or haberdashery for the pendant eye / bail
Method of forming and modeling
-
Coat your work mat, your clay roller and your hands with anti-stick (coolslip) Note: Not too much or the clay will crack.
-
If you are using a silicone mold, then spray it with the antiplastic as well.
-
Lay the laths on your work mat. (If structure is required, always use at least the thick 1.5 mm laths.)
-
Open the bag of clay and knead the clay into a ball for a while. Do not knead for long, as the clay will dry out. Be careful not to leave any plastic behind in the clay.
-
Roll out the clay between the slats with the clay roller. Make sure the clay roller runs on the laths so that the patch of clay will be the same thickness everywhere.
-
If you want a texture in the jewelry, now is the time to roll the texture in. Use a rubber texture mat or a textured wallpaper/paper to do this.
-
Spray the rubber mat or textured paper with the anti-stick.
-
Take the thin slats (1mm thick) Place them on the structure sheet. Place the clay between them and roll out the clay with the clay roller. Roll in 1x from bottom to top. If you roll more often, the pattern will shift and the print will not be good. Again, make sure the clay roller runs over the slats.
-
Flip the rubber mat/textured paper over so that the piece of clay with texture facing up is on your work mat.
-
The shape you want to use can now be cut out. This can be done with a template, a cutter the needle pen or the loomer (clay knife), this can be a free form, depending on your design.
-
If you want your ornament to be, concave or convex or wavy you can let the clay forms that have been cut out dry on a convex form, a concave form or with a straw underneath to create a wave.
-
Let dry. (During class we use a hot plate from an old coffee maker for this, it can also be done with an electric stove, a spice dryer or the like.
-
When it is thoroughly dry remove the workpiece from the drying sheet and let it cool because the metal in the clay makes it very hot. Caution ! The workpiece is now very fragile!
-
Flat sanding can be done by placing a sandpaper on your work surface and gently moving it back and forth, or turning it around. Round/bent surfaces can be sanded by sanding with the sanding pads or gently rubbing with a damp baby wipe.
-
Any holes for pendant eyes now need to be drilled. Use a small drill bit for this. Do this carefully. It is very fragile.
-
Let dry again.
-
Any damage can be touched up with silver clay paste. Moisten the area to be repaired a little. Put a little paste on a brush, repair the spot, allow to dry and then sand. Possibly repeat if 1x is not enough.
-
When it is really dry the ornament can be baked off. This can be done in a special silver clay oven, on the gas stove, with a torch ( hand gas burner), in a hotpot in the microwave.
Refer to the knowledge base for baking methods.
Method of sanding and polishing after firing:
The workpiece is now 99.9% silver and no longer fragile.
-
First brush with a polishing brush.(Hand polishing brush, or electric multi-tool)
-
Any irregularities can now be filed away with micro files. (Do not file over any applied texture or pebbles).
-
Any ear studs to be soldered on can now be soldered on.
-
Sanding and polishing from coarse to fine. The green sanding pads (3M) can be used to polish the jewelry. The longer you polish the more the jewelry will shine. Take your time in finishing!
-
To get extra shine, you can apply polishing paste to the jewelry as a final touch and polish it out with a polishing cloth.
-
By going along edges and over texture with the agate pen. These then light up.
-
To give the jewelry an antique look, you can now blacken it with blitz stain. Apply blitz stain, let it dry and re-sand, polish and brighten the jewelry with the agate stone.Note!Make sure no blitz stain gets on your hands, This is slimy and if it gets into a wound it stings badly.